Photography in Europe
Take Your Best Shot
Digital cameras, point and shoot cameras, DSLRs, lenses, filters, battery chargers.

My room with a view of the Austrian Alps is in a cloister in Hall-in-Tyrol, an historic picturesque village just east of Innsbruck. I was on another visit here to see distant relatives on my maternal grandmother's side of the family.
Carpe diem. Vivere bene! Gratia Deo.
Chapter 12 of
HOW TO EUROPE:
The Complete Travelers Handbook
John Bermont

This entire book is published totally free on-line by the author, photographer, and webmaster, yours truly, with help from my daughter Stephanie. I welcome all questions, comments, compliments, and complaints. For contact information please see NOTE TO READERS. Updated 6 December 2015.

Your Go-To Travel Store
Shoot it.
American and Japanese travelers have at least one thing in common — a camera on a neck strap.
IN GENERAL
This chapter provides some elementary information on cameras, lenses, filters, and other accessories, and taking pictures when in Europe. Key points are: know your equipment and practice, practice, practice.
Pack Light
What kind of camera, lens, and accessories should you use? The bottom line is that your pictures please you. If they don't, all else is for naught. Of course, others might not think that you are the world's greatest camera pro, but what do they know? They weren't there.
Do not neglect the rule of pack light. Be comfortable with the weight and volume of your equipment. In my early travels, I lugged around entirely too much stuff, cameras and lenses being the heaviest single items in a traveler's bag. Based on decades of travel and photography for my book and website, a suggested photo kit is listed at the end of this chapter. That's just my opinion. To judge what you should take with you I have designed the very personal Pack Light Field Test. It's your perspiration.
Digital vs. Film
The digital revolution has accelerated in the past few years. Better cameras and lower prices have all but eliminated film cameras. Finding film is very difficult. Processing and printing, where available, add to the cost and delay your enjoyment of the results.
But film cameras are still used by some people. My film cameras and lenses, which lasted me over 30 years, now languish in a drawer. They are like an old pair of jeans. I just can't let them go. But digital technology has passed them by in so many ways. Move on.

This entrance to the Paris Gare du Nord Metro station displays the unique type font used on many Metro signs. The iron grill work is something they don't make any more either. If you get lost you'll find maps of Paris at most Metro stations. That sure looks like a typical Dutch white-tail bicycle locked up on the grill work.
Operating Manual
Your camera box included an illustrated operating manual. It can be 50 to 200 pages or more. The manuals are very technical. If you want to get the best out of your camera, study your manual. Using a digital camera for maximum results is not simple or intuitive. I am a pretty smart engineer but I have to say that this stuff is difficult to get your mind around. I ended up taking a short course offered by my local camera store. Even though I have been using high quality SLR film cameras for over 30 years this course was invaluable. You never know what you didn't know until you know it.
Before leaving for the airport make sure that you are familiar with the camera and that it is in good working order. Read the entire instruction book, especially if you don't use the camera often. Maybe make a cheat sheet or tab the pages and highlight lines to guide you to the features you'll be using most often. Shoot a batch of photos to make sure that you and it are seeing things the same way. Put them on your computer and zoom in to see the details. If anything is wrong, take it back to your camera shop for a checkup. You would hate to come home from weeks in Europe to find that all your pictures are messed up. It happens.
The following brief discussion will introduce some of the rudimentary features of cameras and lenses. If you believe that the world is flat you can stop with that.
CAMERA
There are two basic types of digital camera — point-and-shoot (PS) and single lens reflex (SLR). A PS camera is relatively easy to operate. You turn it on, point, and shoot. They are small, about the size of a deck of cards, and inexpensive. SLR cameras are big and bulky, and pricey.
Point and Shoot Cameras
While you can just turn on a PS camera and start shooting, PS cameras are so full of features that you better read the instruction manual to get the maximum benefits. Each is different. A typical PS camera includes a built-in flash and a zoom lens. Most have only an LCD monitor screen and not a viewfinder, as in the old film days of range finder cameras. A viewfinder is handy because it allows you to hold the camera against your nose, making it steadier. Cameras with only a screen must be held out from your body and are more likely to shake.
A significant difference between film and digital cameras is the "ISO" you see on the box of digital cameras. ISO stands for International Organization for Standardization. ISO has over 17,000 standards for various products and processes that facilitate commerce. In photography ISO is used to designate film speed. In the old days ISO was known as ASA on film boxes. ASA is the former American Standards Association. With digital cameras there is no film so the ISO applies to the camera. With automatic cameras the camera selects the ISO for you. You can turn off the automatic feature and set the ISO yourself. There is more about ISO in a section below.
An amazing feature in many PS cameras is that they take video recordings. It is a limited option but it works very well for a short glimpse of the action.
My Olympus FE-360 is my second digital PS. It is less than half the size of my first one, an FE-100, now over 5 years old. I love this little thing and have it in my pocket whenever I am out. It takes great pictures in bars and restaurants with the flash, and does a good job outdoors in most light situations. Unfortunately it does not have a viewfinder so I have to hold it out to see the monitor screen.
PS cameras range in price from about $60 to up in the hundreds. Hopefully you get what you paid for. It's best to buy on close-outs. New models are produced almost weekly and the older model inventory has to be cleaned out.

This mural at the Deacon Brodie Tavern in Edinburgh, Scotland briefly tells the story of the varmit. He was a piker compared to modern day criminals. We should bring back public hangings for politicians who corrupt their office.
Single Lens Reflex (SLR) Cameras
SLRs are cameras for professionals and serious amateurs. The term single lens reflex refers to the feature of viewing the subject through the lens by way of a mirror in the camera. When you press the shutter release the mirror flips up and the image beams straight back to the image sensor. In the old days the image went straight back to the film. What you see through the lens is what you get in your image. Flipping the mirror up amd down is why SLR cameras make so much noise. The alternatives were a twin lens reflex camera with two lenses or a camera with a lens and a viewfinder, a rangefinder camera. You can google these terms to find out more about them, and perhaps find used cameras in antique shops.
The most important feature of an SLR is that the lens can be changed. Before the age of widespread use of zoom lenses this was important. Serious photographers carried a range of lenses from wide angle to telephoto. Nowadays one zoom lens can do what half a dozen used to do. For travel photography I've used a zoom lens for decades to cut down on the weight of my camera gear. There is more about lenses in the next section.
SLRs include all of the features of PSs, and then some. They are more complicated and require more understanding of the camera and the lens. After going through the manual of my Nikon D60 a dozen times I finally went to my camera store and took a how-to course. That was time and money well spent. You almost need to be a PhD to operate a digital SLR.
You'll never fit an SLR in your pocket. These cameras are big and bulky. Carry it on a strap around your neck.
The price of SLRs ranges from a few hundred dollars to thousands. Kits, including the camera body and a lens, can be purchased. Or you can buy the camera body and lens separately if you are not satisfied with the lens that comes with the camera kit. Many lenses cost far more than the camera body.

My daughter Stephanie (burgundy top and back to the camera) and fellow students from the Universidad de Salamanca made a field trip to a bull farm near Alba de Tormes, Spain. They got into the ring with a baby bull and started taunting him. The result can be seen at Bull Flight. What kids will get into! Link to this photo at babybull. Photo by one of Stephanie's friends.
LENS
The lens is more important than the camera.
Focal Length
The primary consideration when buying a camera is the focal length of the lens. Focal length is a number expressed in millimeters (mm) which, for practical photo purposes, gives an indication of the field of view. A small focal length, e.g. 21mm, gives a very wide view. A high focal length lens, e.g. 200mm, is a telephoto lens and gives you a telescope view. Technically, the focal length is the distance from a simple lens to a focused image. Modern camera lenses are complex multi lens systems so it doesn't work that way, but that subject is far beyond the scope of this discussion and you don't need to know about it to take photos. By the way, if you have forgotten your high school math lessons on the metric system, a millimeter is a metric unit of length. There are 25.4 of them in an inch. For more on the metric system see chapter 27, The Metric System in Europe.
The term 'focal length' is going out of fashion in describing lenses on PS cameras because it doesn't mean what it used to mean on 35 mm film cameras. If you can find the specifications in your instruction manual the lens' true focal length will be stated and then in parenthesis the equivalent of a 35 mm camera will be shown. For example, my Olympus FE-360 says "6.3 to 18.9 mm (equivalent to 36 to 108 mm on a 35 mm camera)." The section in parenthesis is what I can relate to. The zoom goes from a 36 mm semi-wide angle to a zoom of 108 mm, a pretty good range. The box says the lens is a 3X zoom, which is 18.9 divided by 6.3. The popular Canon Powershot SX110IS has a 10X optical zoom with 35 mm equivalence of 36 mm to 360 mm. Now that's a zoom!
True focal length will probably be indicated on the PS lens but probably not on the box. Instead the box is labeled 3X, 5X, etc. to describe the zoom capability of the lens. Further, the zoom feature on some cameras is divided between 'optical zoom' and 'digital zoom.' Only compare optical zoom because the digital zoom is something you don't want to use. The picture quality goes way down in the digital zoom range.
Focal length is still used on lenses for SLR cameras, but like PS cameras it doesn't mean what it used to mean for 35 mm film cameras. The reason is that the image sensor is smaller than 35 mm film. To relate digital lens focal length to 35 mm film focal length see the instruction manual for your lens. It might be there. My 18-200 mm Nikkor lens is equivalent to a 28-300 mm lens according to one reviewer, Thom Hogan. It's a pretty good 11X zoom lens.

Visitors to Roslyn Chapel outside Edinburgh, Scotland throw coins into the gargoyle head. Children scamper for the misses in the pit below. I scored one hit for two tosses.
f-stop
In addition to focal length, lenses are sized by aperture (diameter). The term "f-stop" is the ratio of focal length to lens aperture. Larger lenses let more light into the camera and are termed "faster" because you don't need as long an exposure time to get enough light on the film or sensor. The larger the lens aperture, the lower the f-stop. Fast lenses can be f/1.2 or f/1.4. Zoom lenses for digital cameras are typically f/3.5 or slower.
The f-stop is set for you by automatic PS cameras and by SLR cameras in automatic mode. You can manually set the f-stop on SLR cameras by switching to aperture priority mode. Why would you want to do that? If there isn't much light available or subjects are moving and you don't want to use the flash, set the aperture at the lowest f-stop. But remember that accurate focusing is important at low f-stops. At correct focus, all lenses produce the sharpest pictures at about f/5.6. If you want to make a photo with subjects both close and far away then stop your lens down as far as you can, say f/22. It will take the camera a lot more time to capture enough light so you may need a tripod or something else to steady the camera. Hope that nothing moves while the shutter is open. When taking long exposure photos it helps to use the delayed release on the camera so you don't shake it when taking the shot. A remote release is also handy. Then you can get in the picture!
ISO
ISO was introduced up above. Here are some more details. In the old days film "speed" was gauged by it's ASA or ISO rating. They are equivalent. A low number, e.g. 25 for Kodachrome, indicated a slow speed. A high number, e.g. Kodak Tri-X 400 black and white, indicated a high speed. A high speed film allowed you to capture moving subjects and to shoot in low light situations without a flash. That would be best of course, but there is a drawback, a trade-off. High speed films have more "grain" in the images. I'm not talking wheat. The grain is a loss of sharpness in the image. You wouldn't notice this on a 3"x5" picture but you could notice if the picture was made into a poster or if it was a slide and you looked at the image with a projector. I shot all kinds of film in my career just for experimentation to see what the results looked like. The Kodachrome 25 was the best by far. Such color and sharpness couldn't be matched by any other film that was available in photo shops. But it was expensive and could only be processed by Kodak. I ended up using Ektachrome 400 for color, and Kodak Tri-X 400 for black and white. I taught myself to develop it and processed the film myself to avoid errors by film labs, and to get the results quicker. Well, that was the old wet chemistry days of film.
Now in the 21st century, film is nearly a dinosaur but ISO lives on. Instead of being the major feature of non-existent film in a digital camera, it is part of the design of the digital camera. My cameras set the ISO automatically, and allow me to do it manually. The ISO ratings I have available are 64 to 1,000 in my PS and 100 to 1,600 in my SLR. At high ISO the same problem of grainy images results, but now the effect is termed "noisy." No wonder the English language has so many words. The noisy nusiance will only be a distraction on extreme zooms and blow-ups. If you are in a low light situation crank up that ISO so you can get the shutter speed as low as possible and freeze the action, not to mention reducing camera shake.

Thirsty patrons crowd the bar in All Bar One at Leicester Square, London, England. This is an example of a low light shot using an ISO of 1,600. The grain shows. This was shot at f4.8 and 1/10th second with the aid of Vibration Reduction on my Nikon. No flash of course. The digital image was enhanced with Adobe Photoshop Elements.
Shutter Speed
Shutter speed is the amount of time that the shutter stays open. This can be set on automatic or you can set this manually. Why would you want to set it manually when the camera can do all the work for you? Well, sometimes the camera can be fooled by high contrast scenes, shadows, and bright lights. When composing your picture take these factors into consideration.
Camera shutter speeds vary from 1/2,000 of a second or faster up to 30 minutes or more. If I am setting the speed manually I usually shoot at 1/250th of a second with an ISO of 400 and f/5.6 for normal outdoor photography. Use faster speeds on fast subjects like a flying bird or a race car in motion. Try panning (following the subject) with these shots to keep them in focus. This blurs the background giving the effect of speed. Using a slow speed in automatic mode is a good way to take pictures of lightning at night, or any night scene for that matter. You need a tripod and delayed or remote shutter release for best results.
The slowest speed practical for a hand-held shot is normally 1/30th of a second. Most people shake the camera a little and it will be noticed in the result if you shoot at 1/15th second or less.
Image Stabilization, Vibration Reduction
A feature on some of the better SLR lenses and PS cameras is called "image stabilization" or "vibration reduction" depending on the brand. These are monikers for a process that reduces shake when taking pictures. For long range telephoto pictures it is a real benefit. It is claimed that IS/VR improves the performance of a camera by several f stops. In other words, it is equivalent to shooting at f/4 when you are actually shooting at f/11. In terms of shutter speed you can get as good a result at 1/15th of a second as you would at 1/60th of a second.
Automatic versus Manual
Most people use the autmatic mode when taking photos. There are several drawbacks to using automatic. I prefer to shoot manually with my DSLR so I get what I want, not what the camera wants. The manual option is normally not available on point-and-shoot cameras.
Calibrate Your Viewfinder Diopter
To shoot manually it is important to calibrate the diopter on your viewfinder. The viewfinder is the little lens you look through on an SLR camera. There should be an adjustment mechanism on the diopter. My Nikon has a small slider on the viewfinder that is rather difficult to move. Check your owners manual to learn how your camera operates.
To calibrate the diopter focus on a distant object that contains some print, say a street sign a block away. If you are using a zoom lens you should zoom the barrel out to the max. Set the camera to aperture preferred in manual mode. Use the lowest f-stop available, for two reasons. First, the lower f-stop will give you the fastest shutter speed. Secondly it will require the most accurate focusing.
Frame and focus the image. Take a picture. Then use the camera's preview screen and zoom in as far as possible. Is the street sign legible? Are the letters perfectly clear? Make a small adjustment in the diopter setting. Take another photo and compare the results. Continue iterating the diopter back and forth until the result is the sharpest you can achieve. You might want to use a tripod or set the camera on a beanbag to reduce camera shake which would interfere with the results.
This calibrating process may take a half hour of your time. Have patience and do it right. You will be happy for decades to come, unless you like phuzzy photos.

I was in Praha (Prague), Czech Republic and so were a dozen bands from Leichtenstein. Dressed in all manner of crazy costumes and drinking plenty of beverage from the local brewery, they played old tunes like "Louie, Louie," "Born in the USA," "I Will Survive," and etc. Mostly brass, they sounded great with echos off the ancient buildings surrounding the central square. What a beautiful night of free music. Goldilocks with the blue boobs must be a real party animal.
THE DARN DETAILS
Camera Batteries
My first point-and-shoot digital camera used AA batteries, probably the most common battery made. They are available nearly everywhere, but there are several diferent types. The standard AA battery is an alkaline type. These do not last long in a digital camera. Another battery claiming to be "ideal for digital cameras" is the nickel zinc type. My experience with these batteries is that they are rubbish. Panasonic makes an oxyride type battery which is not bad. But the champion battery for digital cameras is the lithium AA. In Europe this can be hard to find except in well stocked camera stores. In the USA K-Mart carries it, so stock up if that is the one your camera uses. The best brand I have found is Energizer. Note that the TSA prohibits putting "loose" lithium batteries in your checked luggage. If they are shorted they become hot enough to catch fire. So leave them in the original package or bring them in your cabin luggage.
Some point-and-shoot digital cameras use special or proprietary battery designs. One of the reasons that I bought my first Olympus digital camera is that it uses standard AA size batteries. My second point and shoot has a custom lithium ion rechargeable battery and a battery charger. I charge it up every night. My Nikon SLR also has a custom lithium ion battery and battery charger. If you have a camera which uses standard AA batteries you can use rechargeable AA batteries. These are expensive but they will pay for themselves in a few weeks of travel. Sony and others sell a kit of four rechargeable AA batteries and a battery charger that works in the USA and Europe, with a plug adapter.
Rechargeable batteries for digital cameras come with custom chargers. Most, but not all, chargers work on both European (220v/50Hz) and American (110v/60Hz) electricity. Look at the microscopic specifications on the bottom of the charger brick. All camera battery chargers purchased in the USA come with the American flat prong plugs. You will need a plug adapter(s) in order to plug your charger into an outlet in Europe. See chapter 11, Electricity in Europe: Don't Blow Their Fuses, for detailed information on this topic. Plug designs used in the UK, most of the Continent, Switzerland, and some locations in Italy are different. See the Amazon adverts in the column on the right for images of the different types of plug adapters.
Hazards
Digital cameras are electronic devices. Magnets and strong electrical fields can affect the workings and the images on your chip. Keep a distance between you and strong electrical fields such as motors and any equipment using a motor. At least one manufacturer warns users to stay clear of high voltage electrical transmission lines.

Keep your camera ready to shoot through the windshield as you drive in Switzerland. Scenes like this will greet you as you enter many villages. A family owned Gasthaus is invariably a great place to sleep (unless you have a front room overlooking the noisy road) and almost invariably a great place to have your lunch or dinner. Note: this picture looks a bit rough because it was scanned from the back cover of the second edition of How To Europe.
Pixels
A major item in the specifications describing digital cameras is the number of pixels produced with each shot. Cameras nowadays can produce images 15 megapixels, and more. The image in a digital camera is captured by a small light sensitive electronic device called an image sensor. The image sensor converts light into an electric charge. This charge is converted by electronic circuits in the camera to a digital file for viewing on the camera monitor, that little LCD screen on the back of the camera. With higher pixel ratings you get sharper images and images that can be zoomed for greater detail.
A pixel can be thought of as an atom of data, the smallest individual part of an image. Each electronic image as recorded by a digital camera consists of thousands or millions of pixels sitting side by side. They are like tiles in a mosaic. Each tile has a single color. Because the tiles are microscopic the human eye sees them as a contiguous image. If an image is zoomed in enough the individual pixels can be seen as small squares.
A megapixel is a million pixels. Pixel is an area measurement and a linear measurement. Thus, an image that is 3,872 pixels wide and 2,592 pixels high has 10,036,224 pixels in it. This is normally abbreviated to 10 megapixel or 10 MP. That is the maximum that my digital SLR can do, but I don't use it to the max. Just because you can doesn't mean you should. My camera can also shoot at two lower image quality settings. I use the "normal" setting which is 2,896 wide and 1,944 high, resulting in a 5.6 MP image. That is more than enough for my purpose — publishing on the internet. It gives me some slack to crop and straighten pictures. Then I reduce the size to fit on screen. Adobe Photoshop Elements is a very handy artistic tool, though it takes some training and/or trial and error practice to use it effectively.
It is not hard to take photos these days that use 10 megabytes of chip and disk space. Ask yourself why you need such a detailed photo and if you want to spend all that chip and disk space. If the camera shakes or is out of focus no amount of pixels will help.

Here is the menu board for the Halfway House in Glasgow, Scotland. If you read Scottish you'll know what this stuff is. But if you want to order it you better know how to speak Scottish.
Memory
Digital memory is what collects and saves the image in a digital camera. Some, but not all, digital cameras have built in memory. This is usually a small capacity memory chip. Virtually all cameras have a slot for a memory chip. You should probably have an extra memory chip with you. Before you use the memory chip you must format the chip. It's easy. See your user's manual.
Different brands and models of cameras require different types of memory chips. Many cameras use the SD chip but there are several other standard types. Some cameras use a proprietary chip. Check your camera specifications before buying a memory chip. Or, bring your camera to a K-Mart or Target store and show the clerk what you have.
It stands to reason that the more pixels you have in your image the more memory capacity you need to hold all those pixels. For example, the 5.6 MP image mentioned above requires 1.44 MB of memory. A 2 gigabyte, 2GB or 2 gig, chip would hold about 1,300 photos of 5.6 MP. At 100 photos per day that chip would give you about 2 weeks of service.
Some people edit their photos every night. They throw away the losers and open up chip space. Some people use photo or computer stores to burn a CD disk with their pictures and then wipe the chip. If you are bringing a laptop you can transfer the photos to your hard drive or a flash drive. And some people upload pictures to their email server or another service and then wipe their chip. Before wiping your chip make sure that the images were actually transferred. I don't want to slow down when I travel so I buy another chip when mine is getting full. There are a number of possibilities.

I came upon this movie shoot on the Champs-Élysées in Paris so I decided to do a shoot of my own. Patrons at Fouquet's got more than a busker that day. Busker is the British word for street entertainer. There are plenty of them in Europe.
Whatever you do, set up a file system so you can go back and find what you want later. Stay organized. Cameras have a mind of their own when it comes to naming files. For example my SLR only puts 999 images in a directory on a chip. When the number of images reaches 1,000 it starts a new directory. New image file names begin again at 001. So my 4 GB chip ended up with three directories and the same file name for different images in each directory. This is a nuisance to get sorted out.
Another essential is to make duplicates or back-ups of all your photo files. Store the duplicates on another media, say a spare flash drive. Keep it up to date, unless you want to go back to Brussels just to take another picture of the pisssing boy.

These girls are embarking on a hen's party in York, England. Hen's parties celebrating the last weeks of a girl's single life are very popular in UK bars. In one bar someone threw a cloth over my head and someone else took a picture. I asked what was on my head. The queen of the group said "That was my knickers." Knickers are panties in British English. She was a wild one.
Viewing, Editing, and Printing Photos
Software and a USB cable are included with digital cameras. These allow you to transfer the photos to a computer. From there you can edit them with software like Adobe Photoshop Elements®. Editing a digital photo allows the color of individual pixels to be modified. Cropping is something you will probably always want to do. Rotating the picture is another feature that comes in handy for travel photos. You can't always hold the camera perfectly even. Photoshop allows far more than that to help you improve your pictures. It is an excelent program for enhancing, cropping, resizing, and reducing contrast of your digital images.
You can download Google's software for viewing and organizing your harvest. Picassa includes limited editing features but has a very nice slideshow function. Get it for free at Picassa.
You can burn a CD of your photos. It is much more convenient to transfer them to a flash drive. You don't need the software that came with the camera to transfer images to a flash drive. Use any file manager utility because the camera chip shows up as another drive on your computer. If your computer has an SD chip slot and that is the type of memory chip that your camera uses, transfer the chip and start transferring photos. Just drag and drop into the folder where you want to keep the photos. Drag and drop whole directories to save time. If you are using the USB cable and have two USB ports on your computer you can drag and drop directly to a USB flash drive. I carry my Asus EEE netbook for this and other purposes. Unfortunately I can't recommend Asus any more. They have discontinued the model I bought and have abandoned Linux in favor of Macroshaft. MS is an insecure system, especially on public WiFi. Here is a review of an alternate, the Starling NetBook.
The USB cable can also be used to connect the camera to some printers. The printer must have a USB port and be capable of printing directly from a camera. Some printers get around this by having slots for chip memories. What will they think of next — popcorn?
Your camera package probably also includes a video cable. This can be used to connect your camera to a television for viewing the pictures in big scale. European TVs operate differently. The USA uses a TV broadcasting system named NTSC. In Europe the primary systems in use are PAL and SECAM. You must set your camera video mode to the correct system for your TV, if it can be changed. For more details on European televisions see chapter 22, Moving to Europe. Read your TV operating manual to learn how to connect the video cable.

These Paris students are on strike. Now that's a good way to get an education. Viva la France! Notice the scarves. Everybody wears a scarf in France.
Image Size
Before using a digital camera determine what you plan to do with the images. These little cameras are capable of taking pictures that are much bigger than most computer screens. And the images have file sizes way up in the mega bytes range. Just because you can shoot an image with 20 mega pixels doesn't mean you should. For me, 5 mega pixels is over the top.
If you are using the highest quality image settings on your camera it would be a good idea to use a photo editing program like Adobe Photoshop to reduce the pixel width and the file size. This makes it easier to email the photos and for your friends to view them on screen. Or you can set the image size to 640 x 480 pixels to begin with. This will allow you to get many more images on a memory chip.
Release Mode
Cameras have a function that allows a time delay of maybe 10 seconds before the shutter releases. This allows you to jump into the picture. My Nikon also has a remote shutter release that allows me to stand in the picture and trigger the camera when I am ready, and the scene is clear of distractions.
Time and Date
A nice feature of digital cameras is that each shot has the time and date imbedded with the image. When you upload your images to your computer you can flip through them and re-experience your trip. Use the slide show feature of Picassa.
Make sure that you set the camera date and time for your new surroundings in Europe. Time in Europe is five to ten time zones ahead of your home in the USA. See chapter 28, Time and Dates in Europe, for details on time zones or Maps and Time Zones on this site for links. If you cross time zones in Europe, e.g. Portugal to Spain, reset the time again. On your return flight reset the time and date for your home town.
Continuous Mode
A nice feature of digital SLR cameras is the continous shooting mode. With my SLR I can get three shots per second by holding down the shutter release button. This is handy for objects in motion. Throw away the bad ones.

Real life mannequins in Madrid, Spain hope for a coin in their box. One of them blinked in the next picture. Photo by Stephanie.
ACCESSORIES
Filters
The most important camera accessory is a lens filter. The primary purpose of a filter is to keep some unwanted light out of the camera. This is light that you can't see but the camera can see it. The 1A or UV filters are the most common and practical for outdoor photography. A polarizing filter can give you strikingly improved shots in many situations. It is my favorite. The polarizing filter reduces most reflections producing more saturated colors, and it blues up the sky when aimed at right angles to the sun. If you wear polarized sun glasses you know the effect. Rotate the camera's polarizing filter to get the results you want.
Another critical purpose of a lens filter is that it protects your lens from dirt and damage. Would you rather spend $50 replacing a filter or $500 to replace a lens? On the third drop from a chair in Paris my filter was ruined but my lens survived well enough. I bought a new filter and I was on my way.
Lens Hood
A lens hood reduces the amount of stray light that lands on your lens or filter. This stray light tends to fog your pictures. If direct sunlight hits your lens, you'll have a series of distracting hexagons in your picture. The flexible rubber style that screws into the filter mounting threads is convenient. My Nikon has a clever reversible bayonet mount so it fits over the lens when I am not using it. On the downside, they are all bulky and tend to get in your way.
LCD Monitor Protection
I used to throw my PS camera in my day bag not realizing how fragile it is. Sure enough, I broke the LCD monitor eventually. It still takes pictures but the image is not available until I transfer it to a computer. I bought a camera case for my second PS to protect it against its brutal owner.
Monitor covers are available for some SLR cameras.
Flash Unit
Even though flash units are built in to virtually all digital cameras they are not especially well-suited to travel photography. Most are useless at over 40 feet. For Eiffel Tower pictures at night, you can't use one to reach even the first landing. No museum, public monument, or national cathedral allows the use of flash inside. Many do not allow photography period. Make sure you turn off your flash before shooting in those places which prohibit flash photography.
But for pictures of yourself feasting on the Noix de Veau Riviera a flash unit is handy. I like to take pictures of the food I am about to eat. I also like to take pictures inside bars and cafes. Locals love to pose and ham it up. You need to give the flash unit enough time to recharge after each shot.

This puppet master had a skeleton dancing like crazy to the American rock n' roll from his boom box in Barcelona, Spain. I wasn't the only one there taking pictures. I threw a coin in his upturned hat.
Tripod
Leave your standard tripod at home. Tripods are verboten in virtually every museum in the world, and they are bulky. For long exposures, press your camera against a wall, or balance it on a chair, window ledge, or parking meter with the aid of a handkerchief or small bean-bag. Then use the automatic self-timer to trip the shutter so you don't move the camera at the critical moment.
An alternative is a miniature tripod which is about the size of a jumbo felt tip marker. One end screws off revealing the legs which you fold out. Then screw the end back in for a 6" high camera stand. A great device I first found in a Swiss camera shop is a camera mount attached to a miniature tripod and 2" C-clamp. The C-clamp holds your camera steady on railings and parking meters. There is a similar item in my Amazon.com adverts in the right column.

You would have a hard time out-running these cops on roller blades in Paris, France. I guess that the officer with two bands on his legs is the commander.
PICTURE TIPS
Read
A book that will boost just about anybody up the photography know-how curve is The Complete Photographer by Andreas Feininger. He is formerly a Life magazine photographer. This is an excellent presentation on all aspects of film photography.
To get up to speed on digital photography get a copy of Digital Travel Photography, Digital Field Guide by David D. Busch. David is a professional photographer with 25 years of experience in the field.
While you are over there shooting away, filling chips or using up film, you might want to think about selling some of your pictures. Heck, this can help support your traveling habit. For a starter have a look at Travel Photography: A Complete Guide to How to Shoot and Sell by Susan McCartney. Have fun and make money — that's a deal.
Open Up
Taking pictures is a very personal subject. Most likely if you are traveling with another person, you will be taking pictures of each other posed in front of the cathedral, arch, painting, etc. Good enough. If you are traveling alone ask a stranger to take your picture with your camera. You'll have no trouble getting someone to do this, and you may open the door to an interesting conversation or experience.
Turn Around
Don't forget to turn around. Fifty percent of the scenery is behind you.
Up Close and In the Dark
Many people take pictures of their friends who are standing in shadows or wearing a brimmed hat to shield their eyes from the sun. Automatic exposure cameras use all the light coming in to adjust the aperture. Consequently, the shaded faces of your friends will be rather underexposed. Take the hat off or get them out in the light. You can compensate with your backlight feature or use fill flash. Cloudy days are best for uniform lighting in your photos.
Also have them take off those ridiculous sun glasses. If the light is too bright, find a completely shaded place so that the camera's automatic exposure will not be fooled by bright backgrounds. The absolute worst thing is to shoot into the sun, unless you are trying to make a silhouette.
Another common photo mistake is to take a picture of your friend standing in front of a famous monument or scene — while your friend is 40 feet away from you! What are you going to see in your picture? Position your travel companions up close so you can see the whites of their eyes, with the famous scenery over their shoulder.

Time exposures at night make interesting pictures. Place your automatic camera on a secure place, set the shutter delay release timer, and stand back. This is the Volunteer Fire Department in Faro, Portugal.
Time Exposure
Shooting in available low light will give you some of your best pictures. Try time exposures inside restaurants, stores, taverns, and hotels. Early dawn and just after sundown offer exceptional opportunities for striking time exposures outdoors. In the cities the street lights put out enough light for time exposures all night long. This is especially easy to do with an automatic camera which allows exposures of ten seconds or more.
Off Color
Light conditions affect your photos. In sunshine you get the natural white light of the sun. Normal indoor incandescent light bulbs give off an orangish color light. Pictures taken inside buildings with fluorescent lighting will have a green tinge. Digital cameras have a "white balance" feature to counteract the light conditions. This can be set on auto so the camera does the adjusting, or you can use a manual setting.
High Contrast
Some scenes have high contrast built in. You might be taking a picture of someone wearing a white shirt in the sunlight, and part of the scene is a shaded restaurant patio. The camera will take in what it has been designed to take in and produce an appropriate result. Cameras are not as smart as the human eye. The camera result will be a white washout next to a nearly black blob.
What can you do? Shoot and then doctor the photo. The best known doctor is Photoshop Elements. I use it on almost all my photos. If you are spending four figures on a DSLR camera and lens then another three figures for Photoshop is a no-brainer. It is an amazing photo editing and enhancement software tool.

This view of the De Adriaan windmill and the Grote Kerk welcomes you to Haarlem, The Netherlands when you take the train from Amsterdam.
Postcards
Don't count on your own camera for all your photos of Europe. When buying postcards, buy a few extras for yourself. The aerial views make especially good keepers. Gather up free tourist pamphlets and literature whenever you're in a tourist office. Even if you can't read Greek, some of it is worth framing.
I.D. Your Camera
Put your name on your camera. This can be as simple as printing a small label with your name and phone number and taping it on the underside. I have also had a trophy shop engrave a small sliver of aluminum and I attach that with super glue.
You can also make your first photo a snap of your business card. Make this a "keeper" so it can't be erased with the delete button. If someone finds your camera this would let them know where to return it. Of course a thief could reformat the chip and destroy the evidence.
It has happened only a few times that my film was lost by a lab. One way to reduce the chance of having film lost is to make the first frame on each roll a shot of your name and phone number. Print in heavy block letters: "This film is the property of . . ." on a piece of paper or a handkerchief. Fold it up and carry it with your camera.
You might also write on your I.D. card the date and the name of the place where you are. If you take one of those tours whisking you through 10 countries in 15 days you won't have time for processing on the road, and you'll be in such a fog that you won't know where you were by the time your pictures come back. Digital cameras imbed the date and time with the image so you can always figure out where the picture was taken by cross referencing with your travel record book. Make sure to reset your camera's clock to the local time in Europe when you arrive, and reset it again when you come home.
Verboten
Cameras are prohibited inside casinos, many museums, and other places where you see the camera icon with a line across it. A guard in a Barcelona Metro stop prevented me from taking pictures inside the station. A security guard at the bus depot in Cambridge also prevented me from shooting inside the depot, but escorted me to the door and said I could shoot from there.
If you want to take a picture inside a store or building, you might want to ask permission first. Otherwise do it discreetly so you are not seen. I usually use the discreet method. Outdoors I usually shoot at anything I want but one time the owner of a German gas station came out to prevent me from taking a picture of his station. My German companion was as surprised as I was.
For some reason waiters at fast food junk restaurants do not want me taking pictures of their back-lighted menus and prices. On a recent trip to Europe I decided to try McDonalds in a train station. While waiting in line I raised my little digital camera and snapped a picture of the menu board above the counter. Just as I did so a store clerk waved her hand and shouted "No picture!" It was already done. This was so ridiculous that I took my business to another restaurant in the station. That would have been my first Big Mac in decades.

Stephanie can't hold it in but the mannequin must if he wants any coins in his upturned hat. You see men and women all over Europe performing in the street for donations. This photo was taken as we drove aross France in 1998.
SECURITY
A lot of cameras get stolen in Europe every year. Tourists holding a camera pointing at a famous monument must always be on guard. People are watching you. Some of those people are certified baddies. You should look around to make sure there are no suspicious characters lurking nearby. I've had a number of run-ins with gypsies. They are easy to spot because it is the women who do most of the dirty work and they come dressed in gaudy colorful dresses and scarves. The children are also clever thieves, trained to do it for a living. You are most vulnerable when you are distracted, like when you are making a shot. The thief might have a hard time getting the camera out of your hand but will have little resistance while lifting your wallet as you concentrate on the picture. Pickpockets are clever. A friend had his watch removed from his wrist in a famous Paris museum, the Louvre.
Clever thieves follow their targets. If one of them sees you shortly before lunch the scumbag may follow you into a restaurant. It's not easy to eat while you have a three pound camera hanging around your neck. When you take it off and put it on an adjacent chair, loop the strap through a convenient part of the chair. That will slow him or her down, but will not guarantee security. If you go to the toilet bring your camera with you. Gents, use a stall. It you put your camera on your table during dinner be on alert for distractions which give thieves an opportunity. A theft takes a split second. Remember that most thieves work in gangs. One makes a distraction, one makes the pick, a third takes the hand-off, and disappears.
Thieves also follow their targets into other stores for opportunities. I've read several stories lately about theft of wallets, passports, and cameras inside retail stores. Heck, you trusting Americans leave everything laying out wherever you go. I could have stolen half a dozen purses from shopping carts in my grocery store last week. Hang onto your stuff in Europe.
Many people carry their camera in their day bag. This makes your camera much easier to steal than if it is on a strap hanging around your neck. Keep it on the strap around your neck and keep one hand on it at all times. You want to be ready to shoot, don't you? If gypsies approach take their picture. It is amazing how fast they vacate when I start taking their picture. If you're not holding your camera it will be swinging in the wind and smacking you in the belly with every step. Ouch!
Also put your cameras on your home or apartment insurance policy. This paid off for me years ago when my Olympus OM-2 fell off the camera strap while I was getting off a train in France. The camera was dead but was repairable when I got home, and fully paid by my insurance. Which reminds me that you should definitely send in the warranty card as soon as you buy your camera.
A TRAVELING CAMERA KIT
The List
This is a list of the photography gear I travel with:
- SLR digital camera
- Zoom lens, approximately 18 to 200 mm
- Polarizing filter on the lens
- Point and Shoot 3X or better digital camera
- Point and Shoot digital camera carrying case
- Extra digital memory chip for each camera
- Lens microfiber cleaning cloth
- C-clamp tripod
- Spare batteries and/or 100-240 volt charger brick
- Power strip (200+ volt) or plug adapters
- USB cable
- Camera User's Manual for each camera
User's Manual Redux
Are you one of those people who start using gadgets before you read the instructions? Part of every manufacturer's job is to make their products "idiot proof" to protect you against yourself. Every camera comes with a couple of little booklets, one of which is the user's manual. The other is promotion for more cameras and lenses. You probably threw both of them in a drawer someplace and couldn't find them in two hours. Now is a good time to dig out the manual and stuff it in a corner of your carry-on bag. Thumb through it first and brush up on basic operations if you don't use the camera often. Also, your camera will go bad at one time or another. I guarantee it. It might be a simple thing, but you won't know if you don't have the operator's manual handy.

Out on the beach a pair of Grolsch bier flags wave the sun to its daily rest in Zandvoort, The Netherlands. This little village on the North Sea is one of the best for sun, surf, and suds in Europe in August, despite being 800 miles further north than Chicago.
Have a good trip!
NOTE TO READERS
I welcome questions and comments. If you have any concerns about your trip to Europe that have not been covered well enough in this section please do not hesitate to write and ask. When you write please include relevant details, per the folowing paragraphs.
I do not open attachments. I do not click links to web pages of any kind. I will reply in a day or two, usually.
Do not forget to smell the hyacinths. At your liesure scroll through the Table of Contents of How To Europe: The Complete Travelers Handbook and read all 30 chapters, FREE on line. Good deal! You'll probably find the answers you seek, and some you didn't know you needed.
My email address is [email protected].
FREE
This web site is totally free for everyone, and a labor of love for me. To keep it afloat I receive a commission from Amazon.com for all goods purchased through the adverts I have selected, and any other products you might buy when you are on the Amazon site. Amazon has almost everything for sale, except the Brooklyn Bridge and Mount Rushmore.
Please visit my on-line store at
 .
Your support is most gratefuly appreciated. TIA.
.
Your support is most gratefuly appreciated. TIA.
To like and like not:


Adverts
To support this site:
Please buy your goods at:Amazon.com
Shop in your shorts!
Please clean out your cookie jar before clicking.
What a dandy of a camera! It includes a GPS that automatically sets the internal clock depending on which time zone you are in. You'll always know where and when you took the shot.
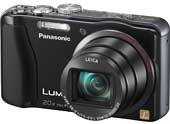 Panasonic Lumix ZS20 14.1 MP High Sensitivity MOS Digital Camera with 20x Optical Zoom
Bring home the memories.
 Olympus FE360 8MP Digital Camera with 3x Optical Dual Zoom (Silver)
This is the camera that I use,
 Nikon D60 10.2MP Digital SLR Camera (Body Only)
with this amazing zoom lens,
![Nikon 18-200mm f/3.5-5.6 G ED-IF AF-S VR [Vibration Reduction] DX Lens](http://www.enjoy-europe.com/images/B000BY52NU.jpg) Nikon 18-200mm f/3.5-5.6 G ED-IF AF-S VR [Vibration Reduction] DX Lens
Nikon 18-200mm f/3.5-5.6 G ED-IF AF-S VR [Vibration Reduction] DX Lens
and this filter to reduce reflections and enhance colors.
 HOYA 72mm Circularizing Polarizing Filter
This tripod clamp is a handy accessory.
 CLAMP-POD Adorama SMALL 4001
Absolutely the best battery for digital cameras which use AA batteries.
 Energizer
AA Lithium Batteries
4 Pack
Plug adapters are needed throughout Europe. There are at least five models used in different countries.
Note: The highlighted #E number is purely arbitrary. It is meant to help quickly identify products in this advert column when you write in for electrical advice.
See NOTE TO READERS.
This adapter is for the standard grounded plug in France, Germany, and northern Europe. It does not fit in outlets of Italy, Switzerland, Ireland, and Britain.
#E-010
 Grounded Universal 2 in 1 Plug Adapter
European Schuko plug.
4.8 mm prongs.
Equivalent to type E and F.
You can use this ungrounded Euro plug in some European countries.
#E-020
 Universal 2 in 1 Plug Adapter
Euro Plug
4.0 mm prongs.
Equivalent to type C.
This is a universal plug adapter for the UK and Ireland.
#E-030
 AC Adapter Plug for use in England, Scotland, Wales, and Ireland
Equivalent to type G.
Here is the Swiss version.
#E-040
 Grounded Universal 2 in 1 Plug Adapter
Type J for Switzerland
Here is the grounded Italian model.
#E-050
 Grounded Universal 2 in 1 Plug Adapter
Type L for Italy
This 50 watt 220/110 volt step down transformer is good for very small 110 volt appliances and light duty chargers.
#E-070
 Travel Smart by Conair 50-Watt International Transformer
Rolling luggage sure beats lugging a pack on your back.
 Travelpro Luggage Maxlite 2 20" Expandable Spinner
A shoulder bag for your daily walk-about.
 Travelpro Luggage Maxlite3 Soft Tote
Keep your stuff organized.

Luggage Packing Cubes
eBags 3pc Set
Wear a money belt under your shirt to protect your passport and valuables, especially if you are staying in hostels or dorms.
 Lewis N. Clark RFID Blocking Waist Stash
An RFID blocking wallet protects your passport and credit cards from identity theft in public places.
 Travelon RFID Blocking Passport Case
A Swiss Army Knife is unquestionably the handiest item a traveler can carry, except not on a plane.
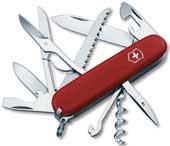 Victorinox Swiss Army Huntsman II Knife
To help find your way on the winding and poorly posted roads of Europe. It works for civilian travelers also.
 Lensatic Military Marching Compass
This will come in very handy very often.
 Fenix LD15
High Performance
LED Flashlight
Inconspicuously lock your zippered luggage with a black wire tie.
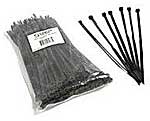 Cables to Go 43036 Cable Ties - 100 Pack (Black)
The links in this pink field take you directly to a page at Amazon.com. The Amazon page details the item, and in most cases includes candid and critical comments from others who have bought the item.
Amazon pays my site a small commission when you click and order an item, if you put it in your shopping cart within 24 hours based on the cookie they set on your computer. If you don't want to make a quick decision just put it in your shopping cart, think it over, and come back later. The revenue covers the cost of maintaing this web site and keeps it free to users.
You benefit when buying here because Amazon has:
- 20% - 30% discount on many items,
- free shipping deals, direct to your door,
- no sales tax on internet purchases in most states,
- zillions of products, well almost,
- fast delivery even when it is free,
- shipment tracking in UPS, USPS, FedEx,
- easy returns if you are not happy with the product.
You win we win. Thanks for your support!!
Have a good trip in life,
John Bermont
Note: Italicized notations by the author.
One of my favorite books. Ernest Hemingway in Paris.
 A Moveable Feast
by Ernest Hemingway
Plug adapters are needed throughout Europe. There are at least five models used in different countries.
Note: The highlighted #E number is purely arbitrary. It is meant to help quickly identify products in this advert column when you write in for electrical advice.
See NOTE TO READERS.
This adapter is for the standard grounded plug in France, Germany, and northern Europe. It does not fit in outlets of Italy, Switzerland, Ireland, and Britain.
#E-010
Grounded Universal 2 in 1 Plug Adapter
European Schuko plug.
4.8 mm prongs.
Equivalent to type E and F.
You can use this ungrounded Euro plug in some European countries.
#E-020
Universal 2 in 1 Plug Adapter
Euro Plug
4.0 mm prongs.
Equivalent to type C.
This is a universal plug adapter for the UK and Ireland.
#E-030
AC Adapter Plug for use in England, Scotland, Wales, and Ireland
Equivalent to type G.
Here is the Swiss version.
#E-040
Grounded Universal 2 in 1 Plug Adapter
Type J for Switzerland
Here is the grounded Italian model.
#E-050
Grounded Universal 2 in 1 Plug Adapter
Type L for Italy
This 50 watt 220/110 volt step down transformer is good for very small 110 volt appliances and light duty chargers.
#E-070
Travel Smart by Conair 50-Watt International Transformer
What a dandy of a camera! It includes a GPS that automatically sets the internal clock depending on which time zone you are in. You'll always know where and when you took the shot.
Panasonic Lumix ZS20 14.1 MP High Sensitivity MOS Digital Camera with 20x Optical Zoom
Bring home the memories.
Olympus FE360 8MP Digital Camera with 3x Optical Dual Zoom (Silver)
This is the camera that I use,
Nikon D60 10.2MP Digital SLR Camera (Body Only)
with this amazing zoom lens,
Nikon 18-200mm f/3.5-5.6 G ED-IF AF-S VR [Vibration Reduction] DX Lens
and this filter to reduce reflections and enhance colors.
HOYA 72mm Circularizing Polarizing Filter
This tripod clamp is a handy accessory.
CLAMP-POD Adorama SMALL 4001
Absolutely the best battery for digital cameras which use AA batteries.
EnergizerAA Lithium Batteries
4 Pack
This 110-250 volt power surge strip has three universal outlets and an American grounded plug so it needs a plug adapter for the countries you are visiting. Make sure your gizmos are rated for 110-240 volts.
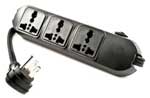 SM-60 Universal 3 Outlet Power Strip Surge Protector for Worldwide Travel. 110V-250V with Overload Protection.
Make sure that your electrical appliances are 110-220 dual voltage so they will work in Europe.
Note: These appliances require a plug adapter(s), NOT a converter, for the countries you are visiting.
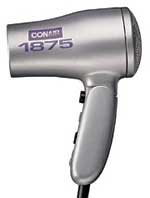 Vagabond Compact Styler
Conair's Dual-Voltage Ionic Hair Dryer
 Conair Flat Iron 2" Ceramic Straightener
Dual Voltage
 Travel Hair Setter
Dual Voltage
Remington H-1015
 SteamFast SF-717 Home-and-Away Mini Steam Iron (dual voltage)
 Braun Series 1 150 Men's Shaver with Automatic Worldwide Voltage Adjustment
For light sleepers here is an international "white noise" machine. Includes a Continental plug adapter.
 Marsona TSCi-330 White Noise Travel Sound Conditioner For both USA and International Use
Look sharp and be comfortable.
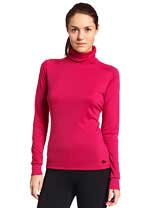 Hot Chillys Women's Peach Skins Solid T-Neck Shirt
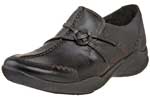 Clarks Women's Wave.Run Slip-On
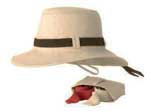 Tilley Endurables TH9 Women's Hemp Hat
Wear a scarf for comfort and style. Nobody will ever suspect that you are an American.
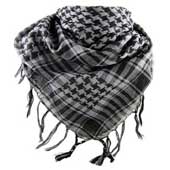 Very soft houndstooth neck scarf, Kanye West style, different colors available
My favorite T-shirt/undershirt has a pocket for securely carrying passport, cash, and credit cards under my outer shirt.
 Hanes Tagless Short Sleeve Tee with Pocket
Wear a money belt under your shirt to protect your passport and valuables, especially if you are staying in hostels or dorms.
Lewis N. Clark RFID Blocking Waist Stash
An RFID blocking wallet protects your passport and credit cards from identity theft in public places.
Travelon RFID Blocking Passport Case
This will come in very handy very often.
Fenix LD15High Performance
LED Flashlight
This is my book, available at Amazon.com. The last edition was published in 2003. Critical up-dates are on this web site.
 How To Europe
The Complete
Travelers Handbook
by John Bermont
The best travel guide to all of Europe.
 Europe on a Shoestring
Lonely Planet
A comprehensive guide to 3,000 hotels and restaurants in 44 major cities throughout Europe, in English. Separate books in the Michelin Red series cover individual countries in greater detail. This is a must have for frequent travelers.
 Main Cities of Europe 2014
Michelin Guide
The Marling Menu Master series is the best for interpreting restaurant offerings in France, Germany, Spain, and Italy.
 Marling Menu Master
France
 Marling Menu Master
Italy
 Marling Menu Master
Germany
 Marling Menu Master
Spain
Further choices for menu readers:
 Berlitz European
Menu Reader
For Eating Out in over 25 Countries
Rolling luggage sure beats lugging a pack on your back.
Travelpro Luggage Maxlite 2 20" Expandable Spinner
A shoulder bag for your daily walk-about.
Travelpro Luggage Maxlite3 Soft Tote
Keep your stuff organized.
Luggage Packing Cubes
eBags 3pc Set
A Swiss Army Knife is unquestionably the handiest item a traveler can carry, except not on a plane.
Victorinox Swiss Army Huntsman II Knife
Inconspicuously lock your zippered luggage with a black wire tie.
Cables to Go 43036 Cable Ties - 100 Pack (Black)
This is my favorite pocket size travel journal.
It is 5½"x3½"x½".
 Markings by C.R. Gibson Brown Ruled Paper Bonded Leather Journal, Small (MJ3-4792)
What a dandy of a camera! It includes a GPS that automatically sets the internal clock depending on which time zone you are in. You'll always know where and when you took the shot.
Panasonic Lumix ZS20 14.1 MP High Sensitivity MOS Digital Camera with 20x Optical Zoom
Bring home the memories.
Olympus FE360 8MP Digital Camera with 3x Optical Dual Zoom (Silver)
This is the camera that I use,
Nikon D60 10.2MP Digital SLR Camera (Body Only)
with this amazing zoom lens,
Nikon 18-200mm f/3.5-5.6 G ED-IF AF-S VR [Vibration Reduction] DX Lens
and this filter to reduce reflections and enhance colors.
HOYA 72mm Circularizing Polarizing Filter
This tripod clamp is a handy accessory.
CLAMP-POD Adorama SMALL 4001